
Having a custom domain for your website is more than just a professional touch; it establishes trust and makes your brand memorable. If you're using Webflow, connecting a custom domain might seem like a technical challenge, but it’s a straightforward process when broken down.
Your website's domain name is its online identity, and using a custom domain can add professionalism and branding to your Webflow site. You must have a domain name to be able to connect your Webflow site to it.
In this guide, we’ll walk you through the steps to link your Webflow site to a domain you own, ensuring your website looks polished and is easily accessible to your audience.
Importance of a custom domain
A Webflow custom domain is foundational for establishing a professional online presence, enhancing brand identity, building trust, and optimizing your website's visibility. It gives you the flexibility, control, and credibility needed to succeed in the digital landscape. Here's why it's important:
Professionalism and Branding
A custom domain on webflow gives your website a professional and credible image. It allows you to create a unique online identity that aligns with your brand, helping you establish a memorable and trustworthy presence.
Brand Recognition and Trust
A custom domain reinforces your brand and makes it easier for users to remember and find your website. It enhances brand recognition, fosters trust and sets you apart from competitors using generic domain names.
Improved Search Engine Visibility
Custom domains can positively impact your search engine optimization (SEO) efforts. Search engines prioritize websites with custom domains perceived as more authoritative and relevant. A custom domain can contribute to higher search rankings and increased organic traffic.
Ownership and Control
With a custom domain or webflow domain setup, you have complete ownership and control over your web address. You are not dependent on third-party platforms or subdomains, allowing you to move your website to different hosting providers or platforms without changing your domain.
Consistency Across Digital Channels
A Webflow domain allows consistency across your digital channels, such as your website, email addresses, and social media profiles. This consistency strengthens your brand identity and creates a cohesive online presence.
Email Address Personalization
A custom domain enables you to have personalized email addresses that match your website's domain (e.g., [email protected]). This adds a professional touch to your communication and reinforces your brand in every interaction.
Steps for connecting custom domain
We'll walk you through the step-by-step process of connecting a custom domain to your Webflow website, ensuring that your visitors can access your site with a personalized web address.
Connecting a custom domain to your website involves a few simple steps. Here's a general guide:
Step 1: Choose your custom domain
Before you can add a custom domain, you need to own one. If you don't have a domain name yet, you can register through a domain registrar like GoDaddy, Namecheap, or Google Domains. Choose a domain name representing your brand or website's purpose.
Step 2: Access your Webflow dashboard
- Log in to your Webflow account.
- In your Webflow dashboard, select the project where you want to connect the custom domain.
Step 3: Go to Project Settings
- Click "Project Settings" on the left panel inside your project.
Step 4: Navigate to Hosting Settings
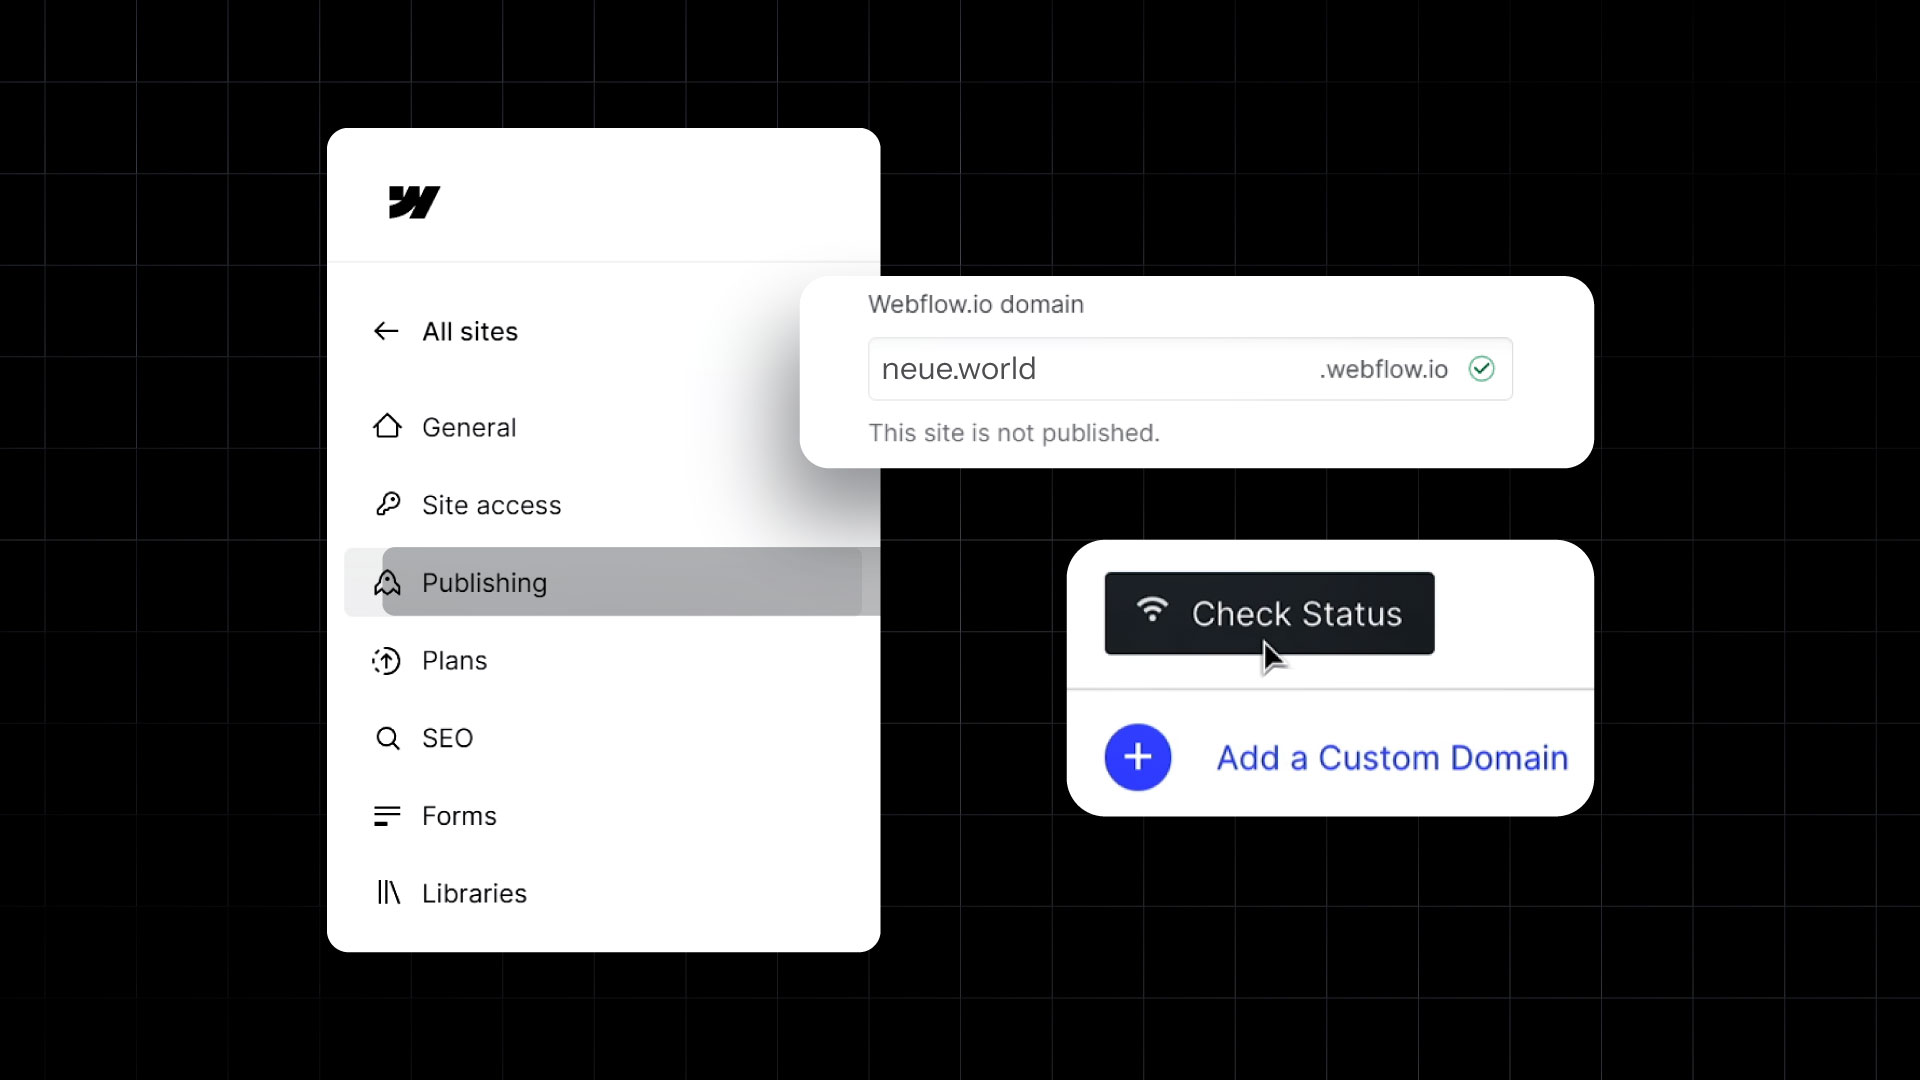
- Within Project Settings, click on the "Publishing" tab.
Step 5: Add a Custom Domain
- Scroll down to the "Custom Domains" section.
- Click the "Add Custom Domain" button.
Step 6: Enter your Custom Domain
- In the pop-up window, enter your custom domain (e.g., www.yourcustomdomain.com) in the input field.
- Click the "Next" button.
Step 7: Configure DNS Settings
- Webflow will provide you with DNS (Domain Name System) settings to configure on your domain registrar's website. These settings typically include an A record and a CNAME record.
- Open a new tab or window and log in to your domain registrar's account.
Step 8: Update DNS Records
- Find the DNS settings or domain management section within your registrar's dashboard.
- Locate the option to add DNS records.
- Add the A and CNAME records provided by Webflow, ensuring that you enter them correctly.
- Save the DNS changes. DNS changes may take time to propagate across the internet, so be patient.

Step 9: Verify the Domain
- Return to your Webflow dashboard.
- Click the "Verify" button next to your custom domain in the "Custom Domains" section.
- Webflow will check the DNS records to confirm the domain's connection.
Step 10: Publish your Site
- After verification, return to the "Hosting" tab in your Webflow project settings.
- In the "Publishing" section, click the "Publish" button to ensure your site is live on the custom domain.
Step 11: Test your Custom Domain
- Open a web browser and type in your custom domain (e.g., www.yourcustomdomain.com) to see if your Webflow website is now accessible via the custom domain.
How to Use SSL with your custom domain
To use SSL (Secure Sockets Layer) with your custom domain, follow these steps:
Obtain an SSL Certificate
You can obtain an SSL certificate from a trusted certificate authority (CA) or through your web hosting provider. Some hosting providers offer free SSL certificates through services like Let's Encrypt.
Install the SSL Certificate
The installation process may vary depending on your hosting provider or server setup. Generally, you'll need to access your hosting account or server administration panel and locate the SSL/TLS section. There, you'll find an option to install or upload the SSL certificate. Follow the provided instructions to complete the installation.
Update Website URLs to HTTPS
Once the SSL certificate is installed, update your URLs to HTTPS instead of HTTP. This ensures that your website is accessed securely. Update internal links, image URLs, and hardcoded references to ensure they use the HTTPS protocol.
Redirect HTTP to HTTPS
Set up a redirect to automatically redirect visitors from your website's HTTP version to the HTTPS version. This can be done using server-side configurations or through your content management system (CMS). Redirecting helps ensure that all traffic is encrypted and improves your website's overall security.
Test and Verify SSL
After making the necessary changes, test your SSL configuration to ensure it works correctly. You can use online SSL checker tools to verify the validity and proper installation of your SSL certificate.
Monitor and Renew SSL Certificates
SSL certificates typically have an expiration date. Monitor the expiration date and renew your SSL certificate before it expires to maintain uninterrupted HTTPS access.
How to Connect subdomain with Webflow
To connect a subdomain with Webflow, follow these steps:
Access Domain Settings
Log in to your domain registrar's account (where your domain is registered) and locate the domain management settings for the parent domain.
Create a Subdomain
Look for an option to create a subdomain within the domain management settings. This option is commonly found under DNS or Domain Settings. Create a new subdomain with a unique name (e.g., subdomain.yourdomain.com).
Configure DNS Settings
Once the subdomain is created, you must configure the DNS settings to connect it with Webflow. Locate the DNS management section and add a new DNS record for the subdomain. Select the record type as "CNAME" (Canonical Name).
Obtain Webflow Hosting Information
In your Webflow account, go to the Project Settings for the website to which you want to connect the subdomain. Under the Hosting tab, you'll find the hosting information you need, which includes the Webflow subdomain (e.g., yoursite.webflow.io).
Update DNS Records
In the DNS management section of your domain registrar's account, edit the CNAME record you created for the subdomain. Enter the Webflow subdomain provided in the Webflow hosting settings as the value or destination for the CNAME record.
Save Changes
Save the DNS record changes and allow some time for them to propagate. DNS propagation can take a few minutes to several hours, so be patient.
Verify Connection
Once the DNS changes have propagated, you can verify the connection by accessing the subdomain in a web browser. It should now display your Webflow website.
It's important to note that the specific steps may vary slightly depending on your domain registrar's interface. If you encounter any difficulties, it's recommended to consult your domain registrar's documentation or reach out to their support for assistance.
Conclusion
Congratulations! You've successfully connected a custom domain to your Webflow website. Your site gains a professional and branded online presence with this personalized web address.
Remember that DNS changes may take some time to propagate, so don't worry if your custom domain doesn't work immediately. In most cases, it should resolve within a few hours, but it can sometimes take up to 48 hours.
Following these step-by-step instructions ensures visitors can easily find your Webflow website using your custom domain, enhancing your online identity and making a memorable impression.