
Introduction
Webflow Cloneables are a fantastic way to share your design expertise and allow others to learn and build upon your web design projects. In the context of design, "cloneable" typically refers to the ability to create copies or duplicates of a design file or template.
This feature allows designers to easily replicate and reuse specific design elements, layouts, or entire design compositions without starting from scratch. For those wondering how to clone a Webflow website, this guide will simplify the process.
In this guide, we'll walk you through the step-by-step process of creating your first Webflow cloneable portfolio, empowering you to contribute to the design community and help fellow designers kickstart their projects with your creations.
Step 1: Design Your Webflow Project
- Log in to your Webflow account or sign up if you don't have one.
- Create a new project or select an existing project you'd like to share as a Cloneable. The process is same for the Webflow FAQ cloneable, a Webflow navbar cloneable, or a Webflow gallery cloneable.
- Design your project as you normally would, paying attention to every detail, from layout to interactions.
Step 2: Structure and Clean Up
- Ensure your project is well-organized with a clear structure. Use appropriate page names and folder hierarchies.
- Review your project to eliminate any unused elements or styles.
- Optimize images and assets to minimize file sizes.
Step 3: Prepare for Cloning
- Create a blank page in your project specifically for instructions and documentation. You can call it "ReadMe" or "Instructions."
- Add detailed instructions on how to use and customize your design. Include explanations for each section or component.
Step 4: Publish Your Project
- Make sure your project is ready for sharing and is error-free.
- Publish your project to a subdomain or custom domain if needed.
Step 5: Share Your Cloneable
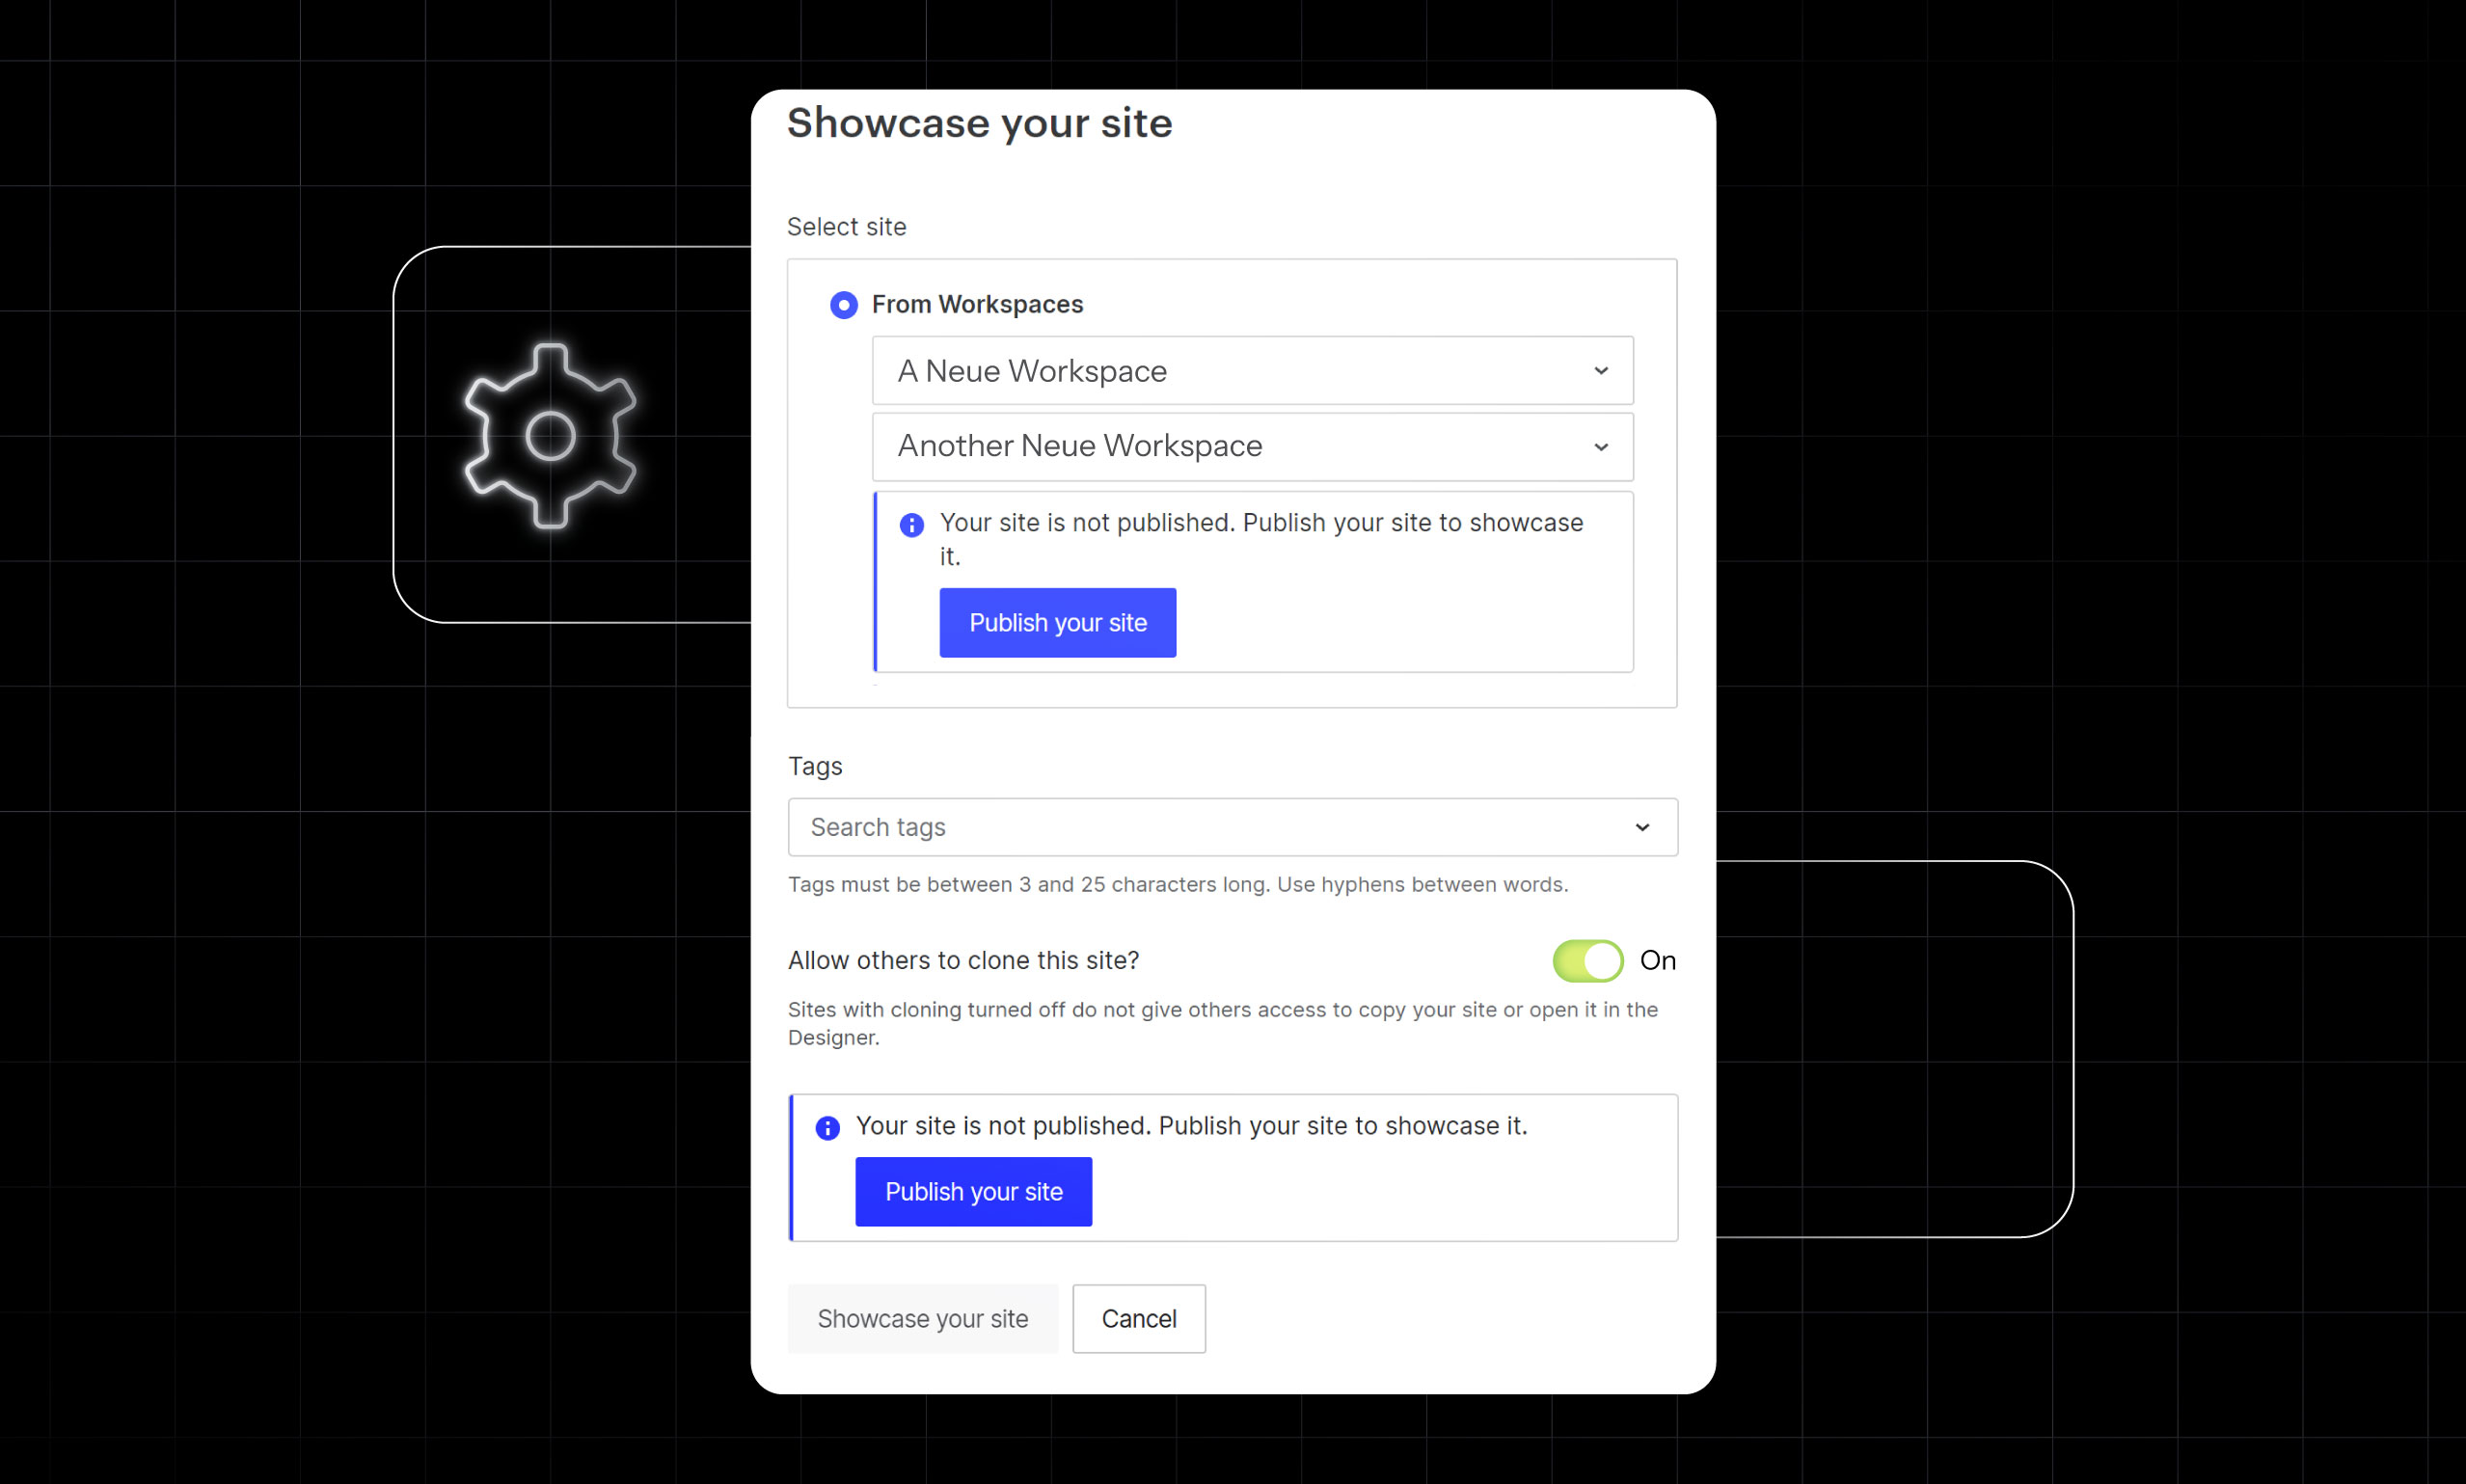
- In your project's dashboard, click on "Settings."
- In the “General” tab scroll down to the "Showcase site" section and turn it on. This will open a tab.
- Enter all the required information.
- Click on “Showcase your site”.
- Click the "Publish" button to save your changes.
Step 6: Cloneable Link
- Once your project is published with cloning enabled, you'll see a "Cloneable" link. Click on it.
- Copy the Cloneable link; this is the link you'll share with others.
Step 7: Share Your Cloneable
- Share your Cloneable link on Webflow's Cloneable platform. You can do this by clicking "Submit Cloneable" on the Cloneables page.
- Fill in the required information, including the Cloneable name, description, and URL to the documentation.
- Click "Submit."

Step 8: Promote Your Cloneable
- Share your Cloneable link on social media, web design forums, and communities like Webflow's forums or Designer News.
- Encourage feedback and collaboration from the design community.
Conclusion
Congratulations! You've successfully created your first Webflow Cloneable, sharing your design skills with the world. By following these steps, you've not only contributed to the design community but also provided valuable resources for fellow designers to learn from and build upon.
Remember that sharing your Cloneables is a great way to showcase your expertise, gain recognition in the design community, and help others accelerate their projects. Keep creating and sharing to inspire and collaborate with fellow designers, fostering a culture of learning and creativity in the world of web design.