
Introduction
Google Tag Manager is a tool by Google that allows you to manage various tracking and analytics services that may be on your site. E-commerce tracking with Google Tag Manager (GTM) involves setting up tags, triggers, and variables to capture and send e-commerce data to Google Analytics or other analytics platforms.
Think about it this way, if Google Analytics and Facebook pixel are Light Bulbs, Google Tag Manager is the Light Switch.
Google Tag Manager, allows you to configure better how the analytics services installed on your site are engaged, essentially it allows you to determine what type of data you’d like to send to your Analytic service.
Example: Let’s say you read a book that says buttons that are colored blue get clicked more by users, so you decide to change a particular button on your site to blue and now you’d like to know when a user clicks that particular button on your page, well, Google Tag Manager can help you with that and also send the results to Google Analytics so that you can view the results.
In this guide, we’ll be teaching you how to set up Google Tag Manager,
Step 1: Go to Google Tag Manager
- Once you’ve signed into the site, if you already have Google Analytics installed on your site you should see a tab called Google Tags, click the website you want.
- If you’re having trouble determining the site you want then simply look for the one that has the same Tag ID as your Webflow Websites Google Analytics Measurement ID.
Step 2: Create an account:
- In this phase on the tag manager home page you’ll see a tab called Accounts, click it and at then you’ll see the option to create an account
- Once you’ve created an account be careful not to close the pop-up that shows on the screen without first copying both code snippets.
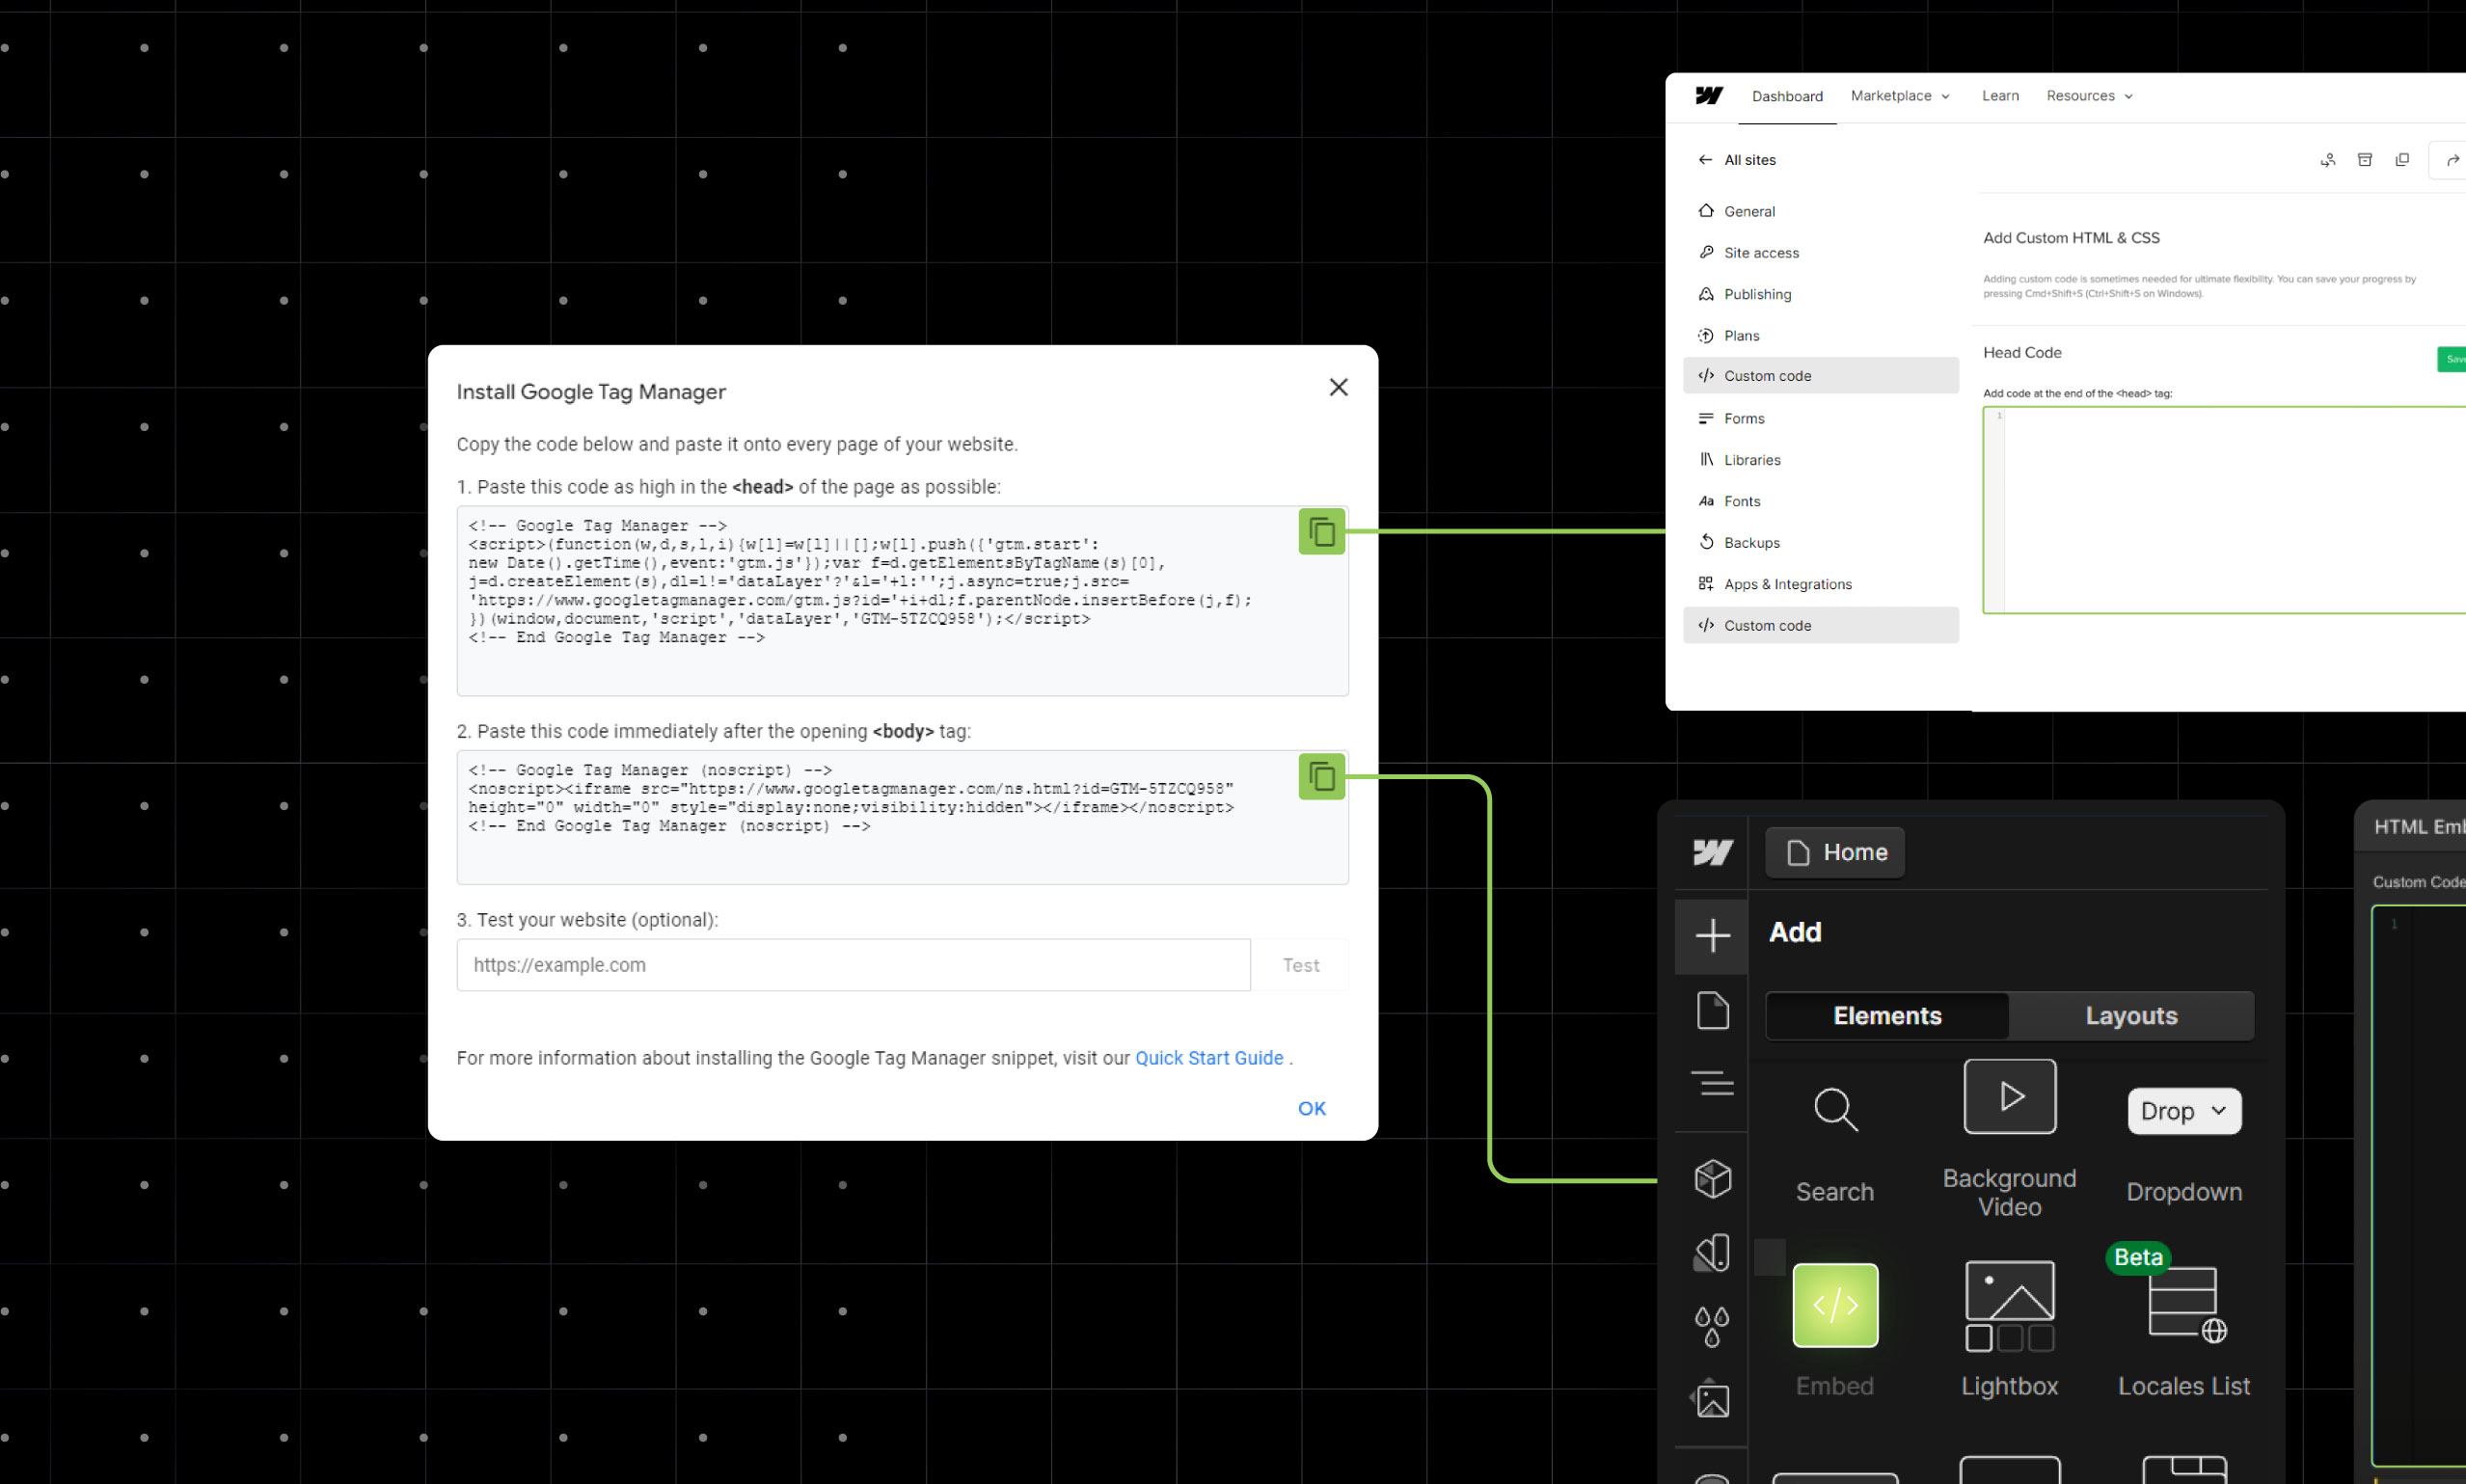
Step 3: Pasting Code Snippets
- Paste the first code snippet into the Head Code of your site. You can find the Head Code of your site by going to the site settings and then clicking on the custom code tab
- Add an embed to your home page and ensure that it is the first thing that comes after the Body of the page, follow this same practice for any other page(s) on which you put the embed (you can accomplish this by checking the Webflow Navigator and dragging it to the top.) Now that that is taken care of paste the second code snippet into the embed. Please note that It is advisable to turn the embed into a component.
Step 4: Publish your site
- Click the publish button
Please note that if you’d like to add more tags you can do so on Google Tag Manager.
After setting up the tags, triggers, and variables, click "Submit" in GTM and publish your container.
Step 5: Test Your Implementation
Use the "Preview" mode in GTM to test the setup. Perform some test transactions on your website and check the GTM preview console to ensure that the data is being captured correctly. In addition, verify the data in Google Analytics to ensure it matches your test transactions.
FAQs
Why should I use Google Tag Manager for my eCommerce site?
GTM simplifies the process of managing tags, allows for faster deployment of marketing and analytics tags, reduces dependency on developers, and provides tools for tracking user behavior and conversion.
How do I troubleshoot issues with my tags?
GTM provides a preview mode for testing and debugging your tags before publishing. You can also use the browser’s developer tools to inspect and debug tag implementation.
Conclusion
Having analytics on your site is a very useful thing, however, it does sometimes get difficult to manage the various tags that may be on your site, but with Google Tag Manager, it’s made a bit easier. By using tools like Google Tag Assistant and verifying your data in Google Analytics, you can catch and resolve any issues before they impact your business.