Article
How do you create a Time to Read calculator in Webflow?
Use Neue World Time to Read tool to calculate the total read time of a text element or rich text element and display the calculated time dynamically on another text element.
Step #1
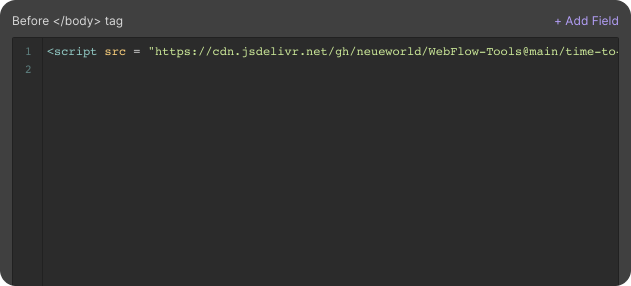
Copy the Time to Read <script>
Copy the script and paste it into the </body> tag of the particular page. You can do so by clicking on
- Pages on the left navigation or, by tapping (P) on your keyboard
- Select the settings icon beside the page you want to add the script in
- Scroll down, you will see a section called Before </body> tag
- Paste it here
Step #2
Set Custom Attributes
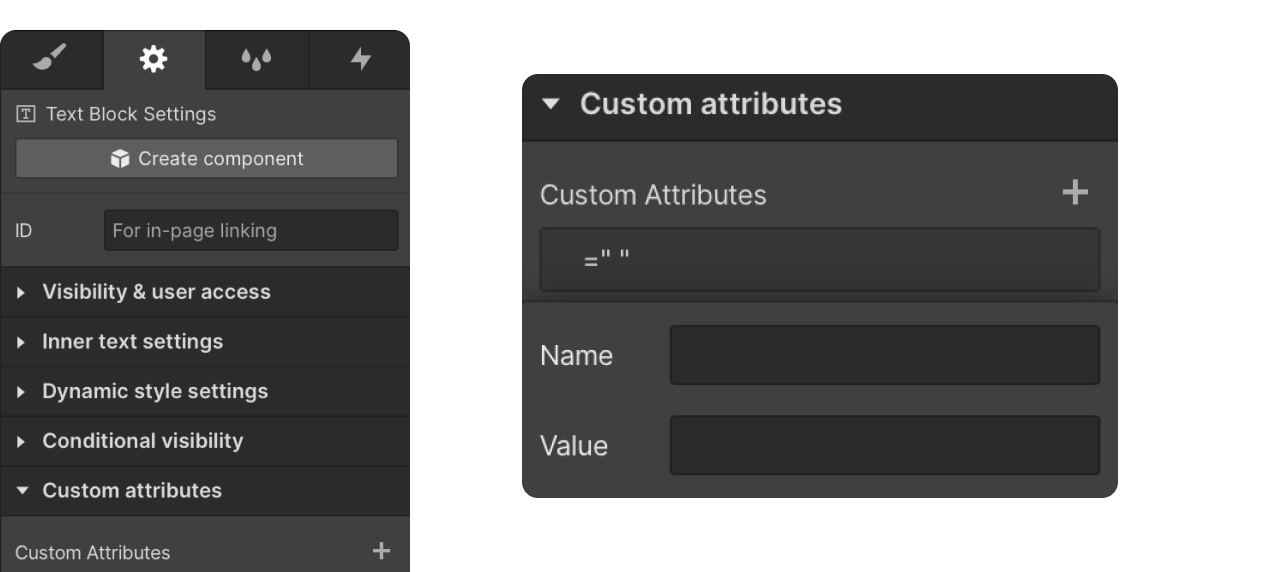
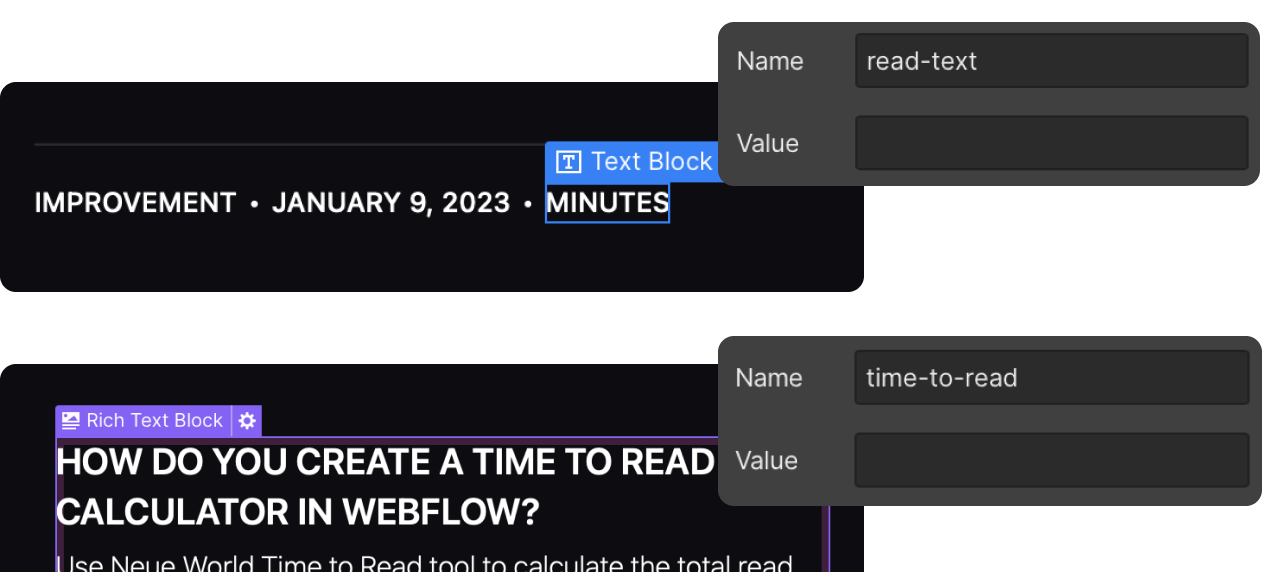
You will need to add attributes to 2 elements on the page. One is for the text that is being read and the other is added to the element that shows how much time it would take to read the content.
- read-text: Add this attribute to the ‘name’ field of the element that the user would be reading
- time-to-read: Add this attribute to the ‘name’ field of the element that would display how much time is needed to read the content
Step #3
Publish your site
It's highly recommended to publish your site on staging environment to make sure the script is working. Once you have confirmed it, you can publish it to your main domain.
